Moisture is the silent killer of 3D prints. Most thermoplastic filaments are hygroscopic — they absorb water from the air over time. A spool that sat open on your desk for a few weeks can produce prints riddled with bubbles, rough surfaces, and weak layer bonds. This guide explains which materials are most vulnerable, how to identify wet filament, how to dry it, and how to store it properly so you never waste a print again.
Even a brand-new spool can arrive with excess moisture if it was poorly packaged or stored in a humid warehouse. When in doubt, dry it first.
Hygroscopic filament ranking
All thermoplastic filaments absorb moisture to some degree, but the rate and severity vary dramatically. Below is a ranking from the most hygroscopic (worst) to the least affected (best). The "time to absorb critical moisture" column gives a rough idea of how long a spool can sit in open air (~50% relative humidity) before print quality visibly degrades.
| Rank | Material | Sensitivity | Time to Degrade (open air) |
|---|---|---|---|
| 1 | PVA | Extreme | 4 – 12 hours |
| 2 | Nylon (PA6, PA12) | Very High | 12 – 24 hours |
| 3 | TPU / TPE | High | 1 – 3 days |
| 4 | PC (Polycarbonate) | High | 1 – 3 days |
| 5 | PETG | Moderate | 3 – 7 days |
| 6 | ABS / ASA | Low-Moderate | 1 – 2 weeks |
| 7 | PLA | Low | 2 – 4 weeks |
Note: Composite filaments (CF-Nylon, GF-PETG, etc.) inherit the moisture sensitivity of their base polymer. CF-Nylon is just as hygroscopic as regular Nylon.
Why some filaments absorb more
It comes down to molecular structure. Nylon's amide groups form hydrogen bonds with water molecules, actively pulling moisture deep into the filament. PLA's ester bonds are less polar, so water mostly clings to the surface and penetrates slowly. PVA is literally water-soluble, which makes it the most extreme case.
Signs of wet filament
Learning to recognize wet filament saves you hours of pointless troubleshooting. Here are the telltale symptoms:
Popping / crackling sounds
The most obvious sign. As moisture trapped inside the filament reaches the hotend, it turns to steam and pops. You can hear it clearly during printing. With severely wet filament, small puffs of steam are visible coming out of the nozzle.
Excessive stringing
Steam expanding inside the nozzle pushes molten plastic out during travel moves, creating thin strings between printed parts. If you had stringing under control and it suddenly got worse, moisture is the likely culprit.
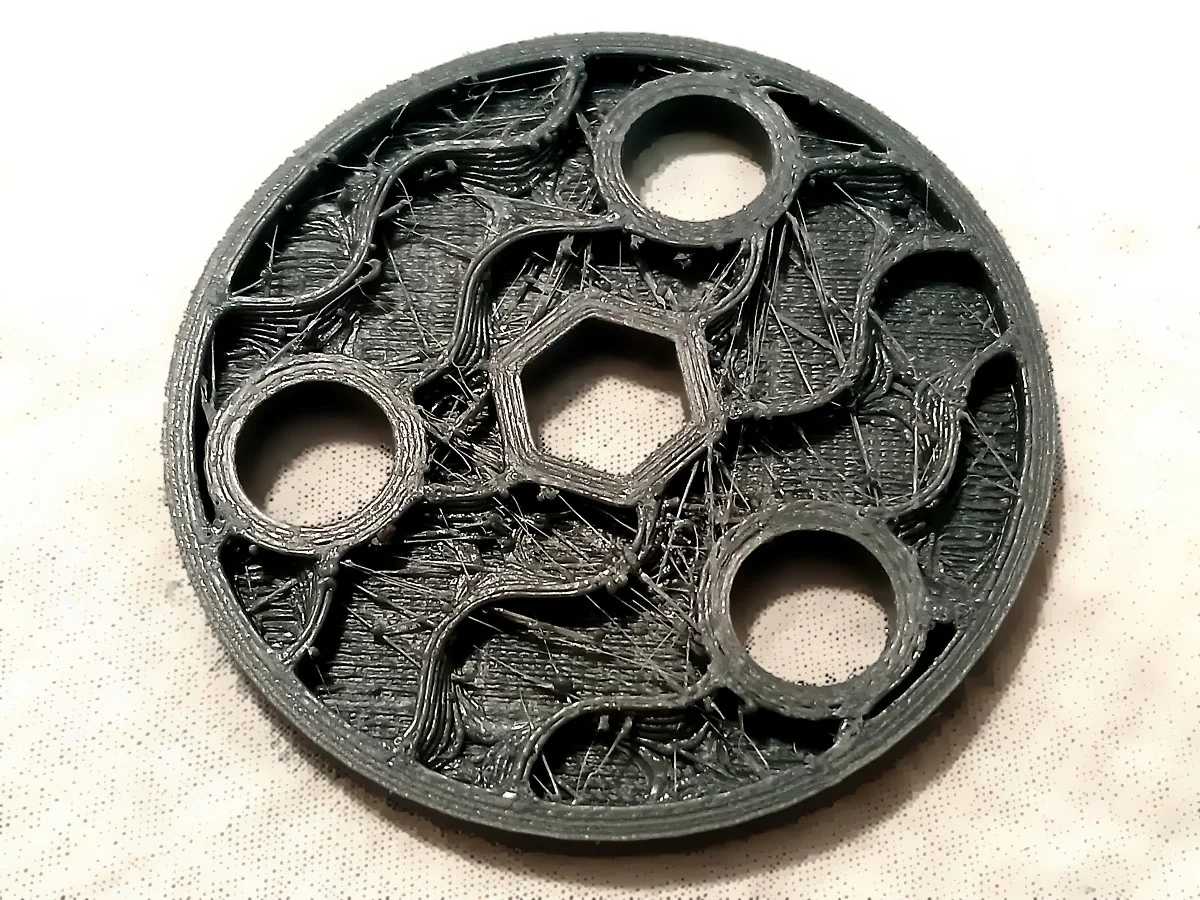
Rough / bumpy surface
Micro-bubbles in the extruded plastic create an uneven, matte, and rough surface texture. Instead of smooth lines, you get an almost "foamy" appearance. This is especially noticeable on transparent or translucent filaments.
Poor layer adhesion
Steam disrupts the bonding between layers. Parts printed with wet filament are significantly weaker and may delaminate (layers separate) under stress that a dry spool would handle easily. This is particularly dangerous for functional parts.
Bubbles in the extrusion
Look closely at the extruded line: if you see small bubbles or voids, that is steam that got trapped as the plastic cooled. On transparent filaments like natural PETG, this turns a clear filament cloudy or milky.
Inconsistent extrusion width
Steam bursts cause intermittent pressure changes in the hotend, resulting in lines that alternate between thick and thin. This can look similar to a clogged nozzle but disappears when you dry the filament.
How moisture damages prints
During printing
When wet filament enters the hotend (typically 190 – 260 °C), the absorbed water molecules instantly boil. Water turns to steam at 100 °C and expands roughly 1,700 times in volume. This violent expansion inside the tiny nozzle causes:
- Micro-explosions that eject plastic irregularly (popping)
- Pressure spikes that push out more material than intended
- Pressure drops immediately after that lead to under-extrusion
- Steam voids in the extruded bead that weaken the structure
Chemical degradation (hydrolysis)
For some polymers, moisture doesn't just cause physical problems — it causes chemical ones. Water molecules break polymer chains through a process called hydrolysis. This is especially relevant for:
- Nylon: loses tensile strength and becomes brittle
- PLA: undergoes slow hydrolysis even at room temperature, becoming increasingly brittle over months
- PC: molecular weight decreases, reducing impact resistance
Hydrolysis is irreversible. Once the polymer chains are broken, drying the filament won't restore the original mechanical properties. This is why prevention (proper storage) matters more than cure (drying).
Dimensional accuracy
Wet filament swells slightly as it absorbs water, changing its effective diameter. Your slicer assumes a consistent 1.75 mm (or 2.85 mm) filament. A swollen filament feeds more material than expected, causing over-extrusion in some spots and under-extrusion in others as the diameter varies along the spool.
Drying methods
Dedicated filament dryer
Purpose-built devices like the Sunlu S2, eSun eBox, or PrintDry are the easiest and safest option. They hold one or two spools, maintain a precise temperature, and let you print directly from the dryer through a filament guide hole.
- Temperature range typically 35 – 70 °C
- Built-in timer (4 – 24 hours)
- Even heat distribution around the spool
- Cost: $30 – $80
Best for: regular use, convenience, print-while-drying workflow.
Food dehydrator
A kitchen food dehydrator (e.g., COSORI, Nesco) works surprisingly well. Remove the trays and place the spool inside. Many models allow temperature control up to 70 °C, which covers most filament types.
- Check that your spool physically fits (measure the interior)
- Choose a model with adjustable temperature, not just preset modes
- Airflow-based drying is very effective at removing surface moisture
- Cost: $40 – $100
Best for: budget option, already owning one, drying multiple spools.
Kitchen oven
Your oven can dry filament, but proceed with caution. Most ovens are inaccurate at low temperatures and can swing 10 – 20 °C above the set temperature, which can warp or melt the spool and even the filament itself.
- Use an oven thermometer to verify actual temperature
- Keep the door slightly open for air circulation and temperature regulation
- Never use the oven's convection/fan mode — hot spots are worse
- PLA spools can deform at temperatures as low as 50 – 55 °C
- Never leave unattended
This method carries the highest risk. If your oven cannot hold a stable low temperature, do not use it. A warped spool can jam your printer or become unusable.
Printer heated bed trick
Place the spool on your printer's heated bed, cover it with a cardboard box or large container to trap heat, and set the bed to the appropriate drying temperature. This is a free method if you already own a 3D printer with a heated bed.
- Only heats from the bottom — less even than dedicated dryers
- Rotate the spool periodically for more uniform drying
- Works best for mild moisture, not severely wet filament
- Ties up your printer while drying
Best for: emergency drying, occasional use, when you don't want to buy extra equipment.
Drying temperatures & times
The table below shows recommended drying temperatures and minimum drying times. These assume moderate moisture levels. Severely wet filament (left out for weeks in humid conditions) may need double the time.
| Material | Temperature | Time (minimum) | Notes |
|---|---|---|---|
| PLA | 40 – 45 °C | 4 – 6 hours | Do not exceed 50 °C — PLA softens at its glass transition (~55 °C) |
| PETG | 60 – 65 °C | 4 – 6 hours | Can tolerate higher temps; 65 °C is ideal |
| ABS / ASA | 60 – 65 °C | 2 – 4 hours | Less moisture-sensitive, dries relatively quickly |
| TPU / TPE | 50 – 55 °C | 4 – 8 hours | Flexible filaments can deform if overheated on the spool |
| Nylon (PA) | 70 – 80 °C | 6 – 12 hours | Deeply absorbed moisture — needs longer drying |
| PVA | 40 – 45 °C | 4 – 6 hours | Water-soluble — handle with extreme care, keep sealed |
| PC | 70 – 80 °C | 4 – 8 hours | High Tg allows aggressive drying temperatures |
General rule: dry at the highest safe temperature for the material and for as long as practical. Over-drying (time-wise) is not a problem — over-heating is. Always stay below the material's glass transition temperature (Tg).
Storage solutions
Vacuum-sealed bags
After drying, seal the spool in a vacuum bag with desiccant packets. This is the most space-efficient storage method and works well for filaments you won't use for weeks or months. Vacuum bags with a hand pump cost very little and are readily available. Pair with 20 – 50 g of silica gel desiccant per bag for best results.
Dry boxes (airtight containers)
Large airtight plastic containers (like IRIS Weathertight or similar) can hold 4 – 8 spools. Add silica gel desiccant in the bottom and optionally a small hygrometer to monitor humidity. Drill a PTFE tube feedthrough to print directly from the box.
- Target: below 15% relative humidity inside the box
- Replace or recharge desiccant when it changes color (orange to green or blue to pink)
- Gasket-sealed containers work best — clip-lock lids are not always airtight
Cereal containers
A surprisingly popular budget hack: large cereal storage containers (4 – 5 L) fit a single spool perfectly. They have a flip-top lid with a silicone seal that keeps air out. Add a small desiccant packet and a mini hygrometer, and you have a single-spool dry box for a few dollars. Drill a small hole in the lid and add a PTFE tube fitting to print directly from the container.
3D-printed dry boxes
The community has designed many printable dry box solutions available on Printables and Thingiverse. These typically use a standard container as the base and add printed accessories: spool rollers, filament guides, PTFE feedthrough fittings, hygrometer mounts, and desiccant holders. Search for "filament dry box" on Printables.com for dozens of designs with varying complexity.
Desiccant types
The most common desiccant for filament storage is silica gel. It comes in two forms:
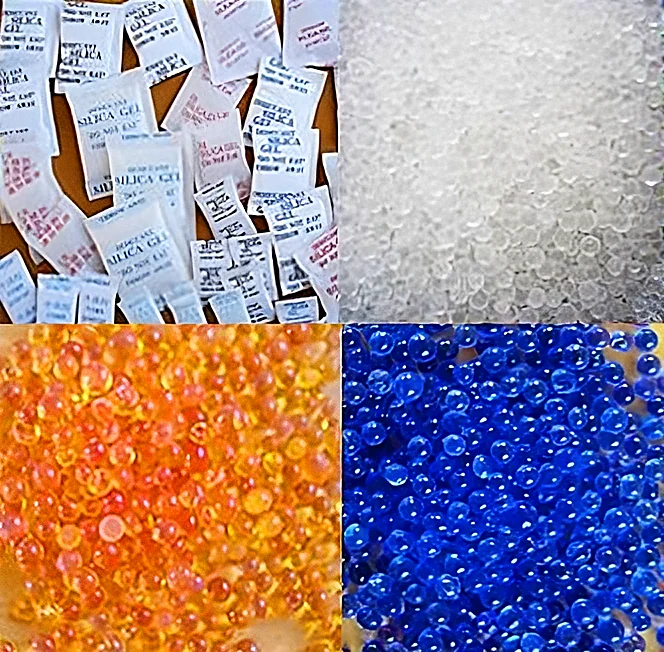
- Indicating silica gel: changes color when saturated (orange → green, or blue → pink). Easy to know when it needs recharging.
- Non-indicating (white): cheaper but you can't tell when it's spent without a hygrometer.
To recharge silica gel: spread it on a baking tray and heat at 120 °C for 1 – 2 hours in an oven. It is reusable indefinitely.
Measuring humidity
Hygrometers
A hygrometer measures relative humidity (RH%). Small digital hygrometers (the round ones that cost $2 – $5 each) are essential for monitoring your dry boxes. Place one inside each container.
| Humidity Level | Status |
|---|---|
| 0 – 15% RH | Excellent — safe for all filaments including Nylon and PVA |
| 15 – 25% RH | Good — safe for most filaments |
| 25 – 40% RH | Acceptable — fine for PLA and ABS, risky for Nylon/PVA |
| 40 – 60% RH | Poor — most hygroscopic filaments will absorb moisture within hours |
| 60%+ RH | Critical — even PLA will degrade; dry and reseal immediately |
Calibrating your hygrometer
Cheap hygrometers can be off by 5 – 10%. To calibrate: place the hygrometer in a sealed bag with a small open container of saturated table salt solution (salt + just enough water to make it damp). After 12 hours, it should read exactly 75% RH. Note the offset and adjust your readings accordingly.
Room humidity matters too
Your workshop's ambient humidity affects how quickly filament absorbs moisture when exposed. If you live in a humid climate (coastal, tropical), filament degrades much faster. Consider running a dehumidifier in your printing room if ambient humidity regularly exceeds 60%.
Long-term effects
Irreversible polymer degradation
Each moisture-absorption-and-drying cycle takes a toll. While drying removes the water, it does not undo the hydrolysis that occurred while the filament was wet. Over multiple cycles, the polymer chains get progressively shorter, leading to:
- Increased brittleness (filament snaps easily on the spool)
- Lower tensile strength in printed parts
- Discoloration (yellowing in Nylon, cloudiness in PETG)
- Changes in print temperature requirements (degraded polymer flows differently)
Nylon: the worst case
Nylon is particularly vulnerable. A spool of PA6 that has been repeatedly exposed to moisture and dried can lose up to 30 – 40% of its original tensile strength. The filament becomes noticeably more brittle, and prints delaminate more easily. For engineering applications where Nylon's mechanical properties matter, a spool that has gone through 3+ wet-dry cycles should be considered compromised.
PLA: slow but steady
PLA degrades slowly but steadily through hydrolysis, even at room temperature in moderate humidity. A spool stored improperly for 6+ months may become brittle enough to snap when bending, even if it has never been "soaked." This is why old PLA spools are sometimes completely unusable — the filament breaks repeatedly during printing.
When to discard filament
Discard filament if:
- It snaps easily when bent (should flex at least 90 degrees without breaking)
- Drying no longer eliminates popping and stringing
- Printed parts are consistently weak or delaminate regardless of settings
- The filament has changed color significantly (yellowed, darkened)
- The spool has been stored improperly in high humidity for many months
Prevention is far more effective than cure. Drying can recover most of the printability of a wet spool, but it cannot restore the original mechanical properties. Store your filament properly from day one and you'll get the best prints — and the longest shelf life — from every spool.