You want to 3D print something unique — a custom phone stand, a replacement part for an appliance, a figurine you imagined. The good news: you don't need to be an engineer or an artist to create your own 3D models. A new generation of free, intuitive tools has lowered the barrier to entry dramatically. Whether you prefer drag-and-drop simplicity, professional parametric CAD, artistic sculpting, or even AI that generates models from a text prompt, there is a tool that fits your skill level and your project.
This guide walks you through the best free and beginner-friendly 3D modeling software available today, explains what each one excels at, and gives you a clear learning path to go from zero to designing your own printable parts.
You don't have to master every tool on this list. Pick the one that matches your project type, learn the basics, and you'll be designing printable models within hours.
TinkerCAD (Autodesk)
The Easiest Starting Point
TinkerCAD is a free, browser-based 3D modeling tool that runs entirely in your web browser — no installation needed. It was designed for beginners and is widely used in schools to teach kids the fundamentals of 3D design. But don't let the simple interface fool you: TinkerCAD is surprisingly capable.
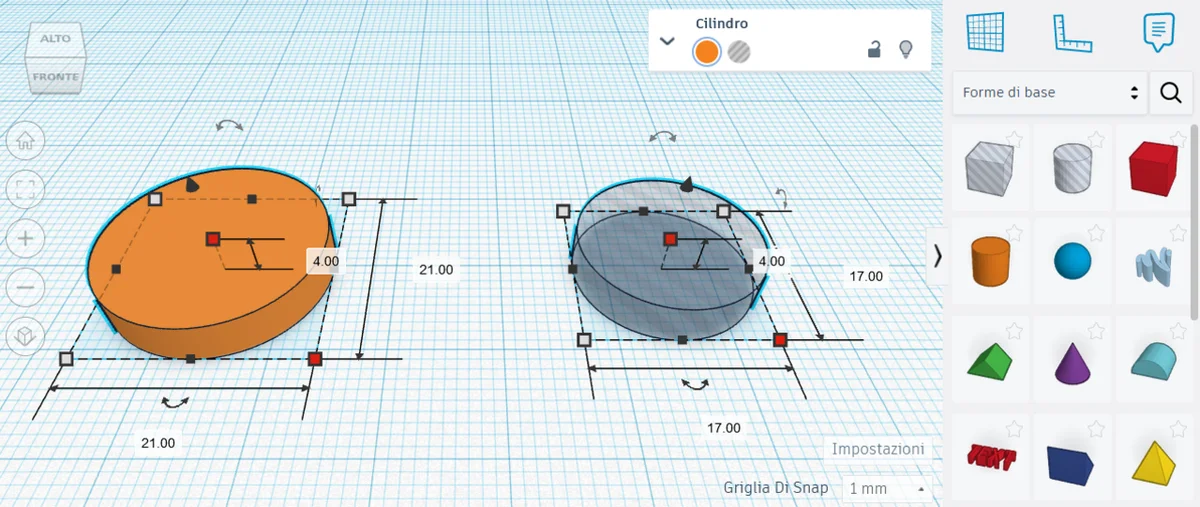
The workflow is pure drag-and-drop. You place primitive shapes (boxes, cylinders, spheres, cones) onto a workplane, resize them, combine them, and subtract one shape from another to create holes and cutouts. That core mechanic — combining and subtracting solids — is enough to design a huge range of practical objects: enclosures, brackets, organizers, nameplates, and more.
Shape Generators
Beyond basic shapes, TinkerCAD includes shape generators — parametric community-created shapes like gears, threads, knurled knobs, and text. These let you create complex geometry without modeling it from scratch. You can also write your own shape generators using JavaScript.
Who Is It For?
Complete beginners, kids, educators, and anyone who needs a quick functional design without a learning curve. It exports STL files directly, ready for slicing.
| Pros | Cons |
|---|---|
| Zero learning curve | No parametric dimensions or constraints |
| Runs in any browser, nothing to install | Limited to combining/subtracting primitives |
| Great shape generators for advanced geometry | Struggles with complex organic shapes |
| Direct STL export | Not suited for precision engineering |
Fusion 360 (Autodesk)
The Industry Standard for Functional Parts
Fusion 360 is a professional parametric CAD tool that Autodesk offers free for personal, non-commercial use. It is the go-to software for designing functional, mechanical, and engineering parts for 3D printing. If you want to design gears, enclosures with snap-fit lids, threaded assemblies, or anything that requires precise dimensions, Fusion 360 is where you should be.
Parametric modeling means that your design is driven by dimensions and constraints. Change a dimension, and the entire model updates automatically. This makes iteration incredibly fast — adjust a wall thickness from 2 mm to 3 mm and every related feature adapts.
Learning Curve
Fusion 360 has a moderate learning curve, but the ecosystem of tutorials is enormous. YouTube channels like Lars Christensen, Product Design Online, and Kevin Kennedy have hundreds of hours of free Fusion 360 training. Most beginners can model their first useful part within a weekend of practice.
Key Features for 3D Printing
Built-in STL/3MF export, section analysis to check wall thickness, interference detection for assemblies, and a timeline that lets you go back and modify any step of your design history. The sculpt workspace also allows organic freeform modeling when you need it.
| Pros | Cons |
|---|---|
| Free for personal use | Requires installation (desktop app) |
| Full parametric modeling with constraints | Steeper learning curve than TinkerCAD |
| Industry-standard, massive tutorial ecosystem | Cloud-dependent (requires internet for some features) |
| Timeline-based design history | Free license has some feature limitations |
OnShape
Professional CAD in Your Browser
OnShape is a fully browser-based professional parametric CAD tool. It offers capabilities comparable to Fusion 360 or SolidWorks, but runs entirely in your web browser — no downloads, no installation, works on any OS including Chromebooks and tablets.
OnShape provides a free tier for hobbyists and makers. The catch: all your designs on the free plan are public (visible to the community). If you don't mind sharing your work, this is an incredibly powerful tool at zero cost.
Collaboration Built In
OnShape was built from the ground up for collaboration. Multiple people can work on the same model simultaneously (like Google Docs for CAD). Version control is automatic — every change is saved, and you can branch designs. This makes it excellent for team projects and open-source hardware.
| Pros | Cons |
|---|---|
| Runs entirely in the browser | Free tier designs are public |
| Real-time collaboration | Requires stable internet connection |
| Automatic version control | UI can feel complex for beginners |
| Professional-grade parametric modeling | Some advanced features are paid-only |
FreeCAD
Open-Source Parametric CAD
FreeCAD is a free, open-source parametric 3D modeler available on Windows, macOS, and Linux. It is developed by a passionate community and has been improving rapidly, especially with the 1.0 release and beyond. If you value open-source software or need a fully offline, no-account-needed CAD tool, FreeCAD is the answer.
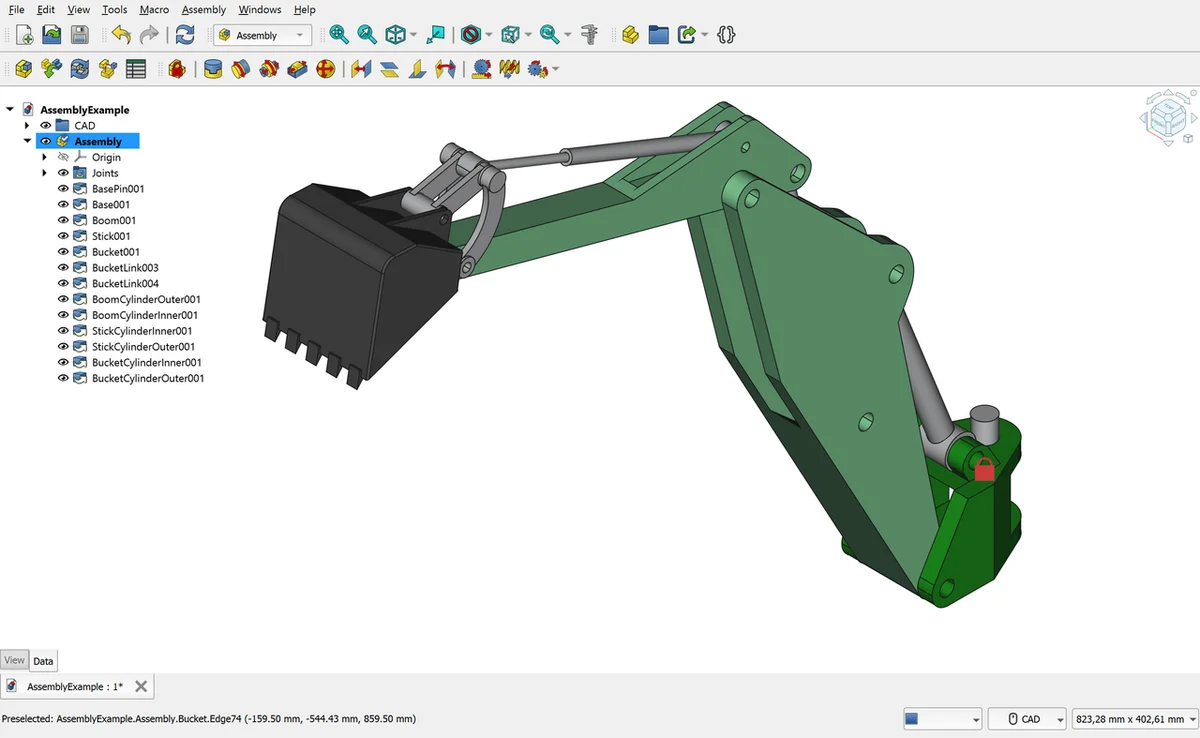
FreeCAD supports sketches, constraints, pad/pocket operations, fillets, chamfers, and most features you'd expect from parametric CAD. The Part Design workbench is the main environment for solid modeling, while the Sketcher workbench handles 2D profile creation with constraints.
Learning Curve
FreeCAD has a steeper learning curve than Fusion 360, partly because the UI is less polished and partly because some workflows differ from commercial tools. The topological naming problem — where features break when you modify earlier steps — has been a long-standing issue but is being actively addressed in recent versions. The community forums and wiki are excellent resources.
| Pros | Cons |
|---|---|
| Completely free and open-source | Steeper learning curve |
| No account needed, fully offline | UI is less polished than commercial tools |
| Cross-platform (Windows, macOS, Linux) | Some workflow quirks and historical bugs |
| Extensible with Python scripting and add-ons | Smaller tutorial ecosystem than Fusion 360 |
Blender
Best for Organic and Artistic Models
Blender is a free, open-source 3D creation suite that is arguably the most powerful free 3D software in existence. It handles modeling, sculpting, animation, rendering, compositing, and more. For 3D printing, Blender excels at creating organic, artistic, and freeform shapes — characters, creatures, sculptures, jewelry, terrain, and decorative objects.
Blender uses mesh modeling (manipulating vertices, edges, and faces) and sculpting (pushing and pulling virtual clay). This is fundamentally different from the parametric approach of Fusion 360 or FreeCAD. You don't define dimensions — you shape the model visually.
3D Printing Considerations
Blender is not ideal for precise mechanical parts. Entering exact dimensions is possible but cumbersome compared to parametric CAD. Where Blender shines is models that would be difficult or impossible to create in CAD: organic shapes, detailed figurines, artistic vases, and custom lithophanes.
Blender includes a 3D Print Toolbox add-on that checks your mesh for common issues: non-manifold edges, zero-area faces, and thin walls. Always run this before exporting for printing.
| Pros | Cons |
|---|---|
| Completely free and open-source | Not designed for precise mechanical parts |
| Unmatched for organic/artistic modeling | Steep learning curve (complex UI) |
| Powerful sculpting tools | No parametric constraints or dimension-driven design |
| Massive community, thousands of tutorials | Models may need repair before printing |
SketchUp
Intuitive for Architectural Models
SketchUp is known for its push-pull interface that makes 3D modeling feel intuitive. Draw a 2D shape, then push or pull it into 3D. It's that simple. Originally developed by Google and now owned by Trimble, SketchUp has a free web version that runs in your browser.
SketchUp is particularly popular for architectural models, building layouts, furniture design, and geometric objects. If you're designing a shelf bracket, a box with compartments, or a model of your house, SketchUp's spatial logic clicks quickly.
3D Printing with SketchUp
The free web version can export STL files. However, SketchUp can sometimes produce models with reversed faces or non-manifold geometry, so you may need to run models through a repair tool (Meshmixer or the Netfabb online service) before slicing.
| Pros | Cons |
|---|---|
| Very intuitive push-pull interface | Free version has limited export options |
| Great for architectural and geometric models | Not parametric — hard to make precise changes |
| Free web version available | Models may need mesh repair before printing |
| Large library of user models (3D Warehouse) | Not suited for organic shapes |
AI-Powered 3D Generation
The New Frontier (2025-2026)
AI-powered 3D model generation has exploded in capability. A new wave of tools can create 3D models from a text description or a single photograph, producing usable results in seconds to minutes. While these tools are not yet a replacement for manual modeling, they are a powerful starting point and a game-changer for quick prototyping.
Text-to-3D Tools
Type a description and get a 3D model:
- Meshy — one of the most popular text-to-3D platforms. Produces textured models with decent geometry. Offers free credits to start and exports in common formats (OBJ, FBX, GLB, STL).
- Tripo3D — generates detailed 3D models from text or images with fast turnaround. Known for good quality meshes and a user-friendly interface.
- Rodin by Hyper — AI-powered generation aimed at game and creative assets. Produces high-quality textured 3D models from text prompts or reference images.
Image-to-3D
Take a photo of a real object, upload it, and these tools attempt to reconstruct it as a 3D model. This is incredibly useful for replicating broken parts, creating models of existing objects, or turning concept sketches into 3D geometry. Most of the tools above (Meshy, Tripo3D, Rodin) also support image-to-3D workflows.
Current Limitations
AI-generated 3D models are improving rapidly, but today they come with real limitations:
- Messy topology — the mesh often has unnecessary density, overlapping faces, or non-manifold geometry that slicers cannot process directly.
- Not always watertight — holes in the mesh, inverted normals, and disconnected parts are common.
- Approximate dimensions — AI does not understand real-world scale. You'll need to resize and verify measurements.
- Detail loss — fine details like threads, snap-fit features, or precise mechanical interfaces are beyond current AI capabilities.
Best Workflow: AI Generate, Then Clean Up
The most effective approach is to use AI as a starting point, not the final product:
- Generate the model using a text-to-3D or image-to-3D tool.
- Import into Blender or Meshmixer (see below) for cleanup — fix topology, close holes, smooth surfaces.
- Scale to the correct real-world dimensions.
- Run a mesh analysis to ensure it is watertight and printable.
- Export as STL or 3MF and slice normally.
Meshmixer (Autodesk)
The Swiss Army Knife for Mesh Repair
Meshmixer is a free tool from Autodesk designed specifically for working with triangle meshes — the format 3D printers use. It is not a modeling tool in the traditional sense. Instead, it excels at repairing, remixing, and preparing existing models for 3D printing.
Key Capabilities
- Mesh repair — automatically fix non-manifold edges, fill holes, and correct inverted normals. Essential after AI generation or SketchUp exports.
- Remixing — combine parts from different STL files, cut models, add or remove features.
- Hollowing — make solid models hollow to save material and reduce print time.
- Support generation — Meshmixer's tree supports were legendary (and inspired the tree supports now built into slicers).
- Analysis — wall thickness analysis, overhang detection, and stability checks before printing.
Note on Availability
Autodesk has officially discontinued Meshmixer, but the last version is still available for download and remains fully functional. For newer alternatives, consider Blender (with the 3D Print Toolbox) or the Microsoft 3D Builder app on Windows for simple mesh repairs.
Tips for Designing for 3D Printing
Wall Thickness
Every wall in your model must be thick enough for your printer to produce. As a rule of thumb, minimum wall thickness should be at least 2x your nozzle diameter — so 0.8 mm for a 0.4 mm nozzle. For structural parts, aim for 1.2 mm (3 perimeters) or more. Walls thinner than 0.4 mm are almost impossible to print reliably.
Overhangs
FDM printers deposit plastic layer by layer. Any surface that extends outward beyond 45 degrees from vertical without support underneath is an overhang and may droop or fail. Design with this in mind: add chamfers or fillets to reduce overhang angles, or orient your model on the build plate to minimize them.
Bridging
A bridge is a horizontal span between two supported points. Most printers can bridge up to 50-60 mm with PLA and good cooling. Beyond that, sag becomes significant. If your design requires longer spans, add intermediate supports or redesign to avoid unsupported horizontal runs.
Tolerances for Assemblies
If parts need to fit together, account for the printer's dimensional accuracy. A general starting point:
| Fit Type | Gap per Side |
|---|---|
| Tight / press fit | 0.1–0.15 mm |
| Normal / snug fit | 0.15–0.25 mm |
| Loose / sliding fit | 0.25–0.4 mm |
These values vary by printer, material, and settings. Print a tolerance test to calibrate for your specific setup.
Orientation Matters
How you orient a model on the build plate affects strength, surface finish, support requirements, and print time. 3D printed parts are weakest along the Z-axis (layer adhesion). Orient your model so that the primary load direction is along the X/Y axes (within the layer plane) whenever possible.
Recommended Learning Path for Beginners
If you're starting from zero, here is the progression we recommend:
-
Start with TinkerCAD (1-2 weeks)
Learn the fundamentals: combining shapes, making holes, thinking in 3D. Design simple practical objects (phone stand, cable clip, nameplate). Get comfortable exporting STL and printing your designs. -
Move to Fusion 360 (1-3 months)
Learn sketching, constraints, extrude/cut, fillets, and chamfers. Start with 2D sketch-to-3D workflows. Follow a beginner YouTube series. Design functional parts: enclosures, brackets, replacement parts. This is the skill that will serve you for years. -
Add Blender for artistic projects (ongoing)
If you're interested in figurines, sculptures, organic shapes, or artistic prints, learn Blender's sculpting and modeling basics. Blender Guru's "Donut Tutorial" is the classic starting point for Blender beginners. -
Explore AI tools for rapid prototyping (anytime)
Use Meshy or Tripo3D to quickly generate starting shapes, then refine them in Blender or Fusion 360. AI tools are excellent for inspiration and rough drafts.
The Most Important Advice
Design something you actually need. Learning 3D modeling through tutorials alone is slow and forgettable. Having a real project — a broken part to replace, a custom organizer, a gift — gives you motivation and context. You'll learn ten times faster when you're solving a real problem.